
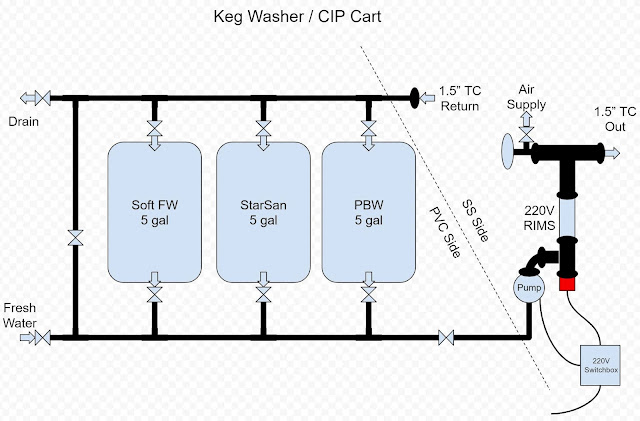
Working on building a cheap self contained CIP pump / heater / storage cart (as well as functioning keg washer). It should be under $350 all total, as opposed to $6,000 like the one at the left, since it it mostly made out of PVC and plastic buckets. The most expensive part on here is the 1.6 hp lawn pump and the 240v RIMs heater and SS triclamp parts. Much thanks to the posts and DIY projects at HomebrewTalk Forums.
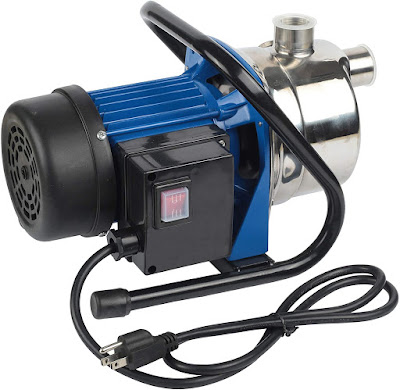
I knew it needed good unrestricted flow for CIP and I wanted to be able to heat inline/recirculate PBW, StarSan, and fresh rinse water. I started out with a couple ideas for simple PVC wash station, and lined out how I would want it designed and put it all on google drawings. I knew I needed a higher flow pump than my brew pumps as they don't move enough water to make the CIP really fly. I also thought I should use at least 3/4" I.D. PVC or it was going to be limited. I started with a couple lift/lawn sprinkler pumps on Amazon.
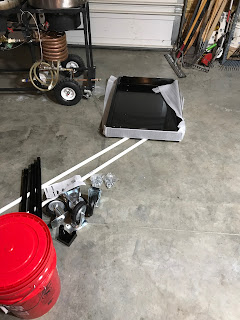
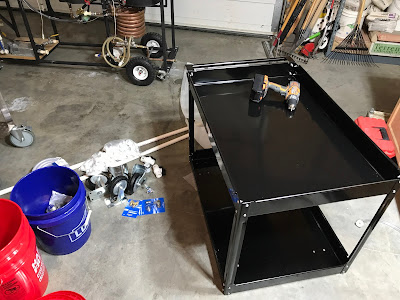
After about 2 hours at Lowes, I got most of the fittings all figured out and a cart from Harbor Freight to mount it all on. It needed to be able to have the 3 5 gallon reservoirs and all the plumbing/return valves and pump as WELL as the electrical panel (properly grounded for safety around electricity and water) and the RIMS heater tube.
After the cart was built (my fingers are getting less and less dexterous after 50 and small children in China with tiny spider fingers can put these million little bolts on), I started laying out how the buckets and return line would route.
This would be mostly a gravity return (except maybe the Sankey keg washer, since that will build some pressure) from the kettles and the fermenters so I wanted to have it pretty low on the cart and have hose that dipped down into the buckets to possibly help with siphon.
Scribbled plans and rough notes on some of the fittings I needed to get. This was cryptic at best, but had some details like was it connecting to 3/4" slip or NPT and exactly how many 3/4" PVC slip and 90' elbows I needed (ultimately, it never goes quite that well, and you end up making 5 more trips to the hardware store...grin).
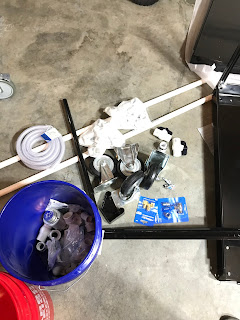
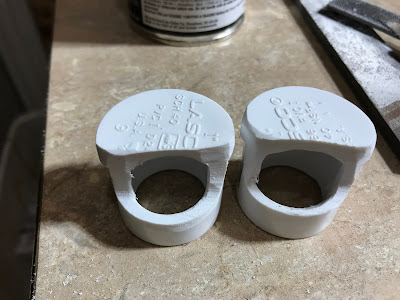
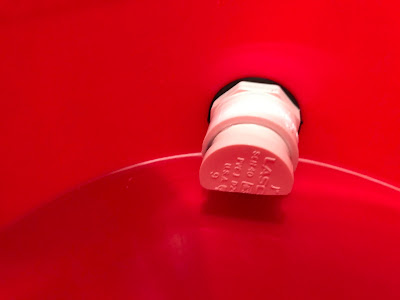
I'll put lids on the buckets later with holes cut, but I put in the 1" PVC bulkheads. I installed 1" plugs on the inlet side that I ground open the bottom of to help make it pull more of the water out of the buckets (sort of a poor man's dip tube). Should still have plenty of flow for the 3/4" feed.
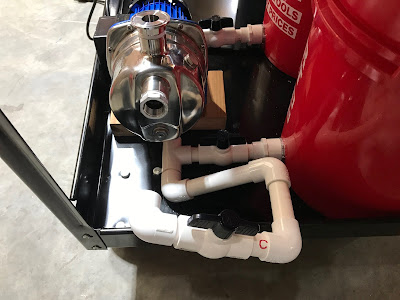
I messed up a bit on gluing and got a little ahead of myself as the final ball valve before the pump (on the right in image below) is routed right up to the cart wall once placed back on the cart. Doh! That final ball valve is used to stop any back flow if pump is off, but technically is sort of redundant to all the others in place, unless I want to do some filling of buckets from fresh water and to allow me to pressure the kegs to push liquid out, so I left it in. From left to right, the buckets will be Rinse Water (soft), StarSan, and PBW (also soft water as I've read a lot about how oxiclean and PBW can react and leave deposits with hard water).
So far, it is going well gluing up all the PVC and getting bulk heads drilled and fixed in the buckets. Below I cut off the errant ball valve placement and put in a 90' fitting (not final glued until pump arrives for final placement), and now sort of have to figure out how / where the pump will sit (possibly upside down mounted to top rack?). Ultimately, it will need to route to a RIMS tube that needs to be oriented upright for the hot water to flow up the length where the element is and not have dead air spots. And I don't relish the idea of getting the pump up too high as it will make self priming more difficult.
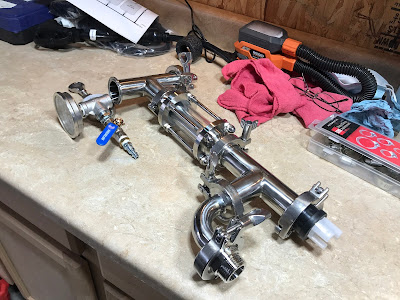
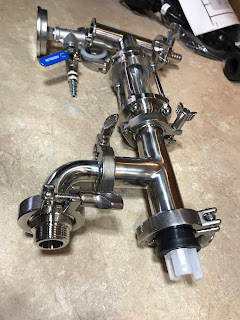
I think it is going well, but the final piece of the puzzle will be fitting the pump connections and mounting in place with the RIMS tube oriented in a vertical position to allow water to convection up the tube so I don't have trapped air in it. The return design below will have 1.5" SS triclamp to 3/4" NPT fitting on the left (the return inlet) and can select any of the reservoirs to dump into or dump to waste water on the far right. I will have a flexible 3/4" high temp heavy duty hose connected to 3/4" barbs to 1.5" TC for hooking up to my boil kettle CIP port and drain as well as my 1BBL unitank fermenter.
I've found it is INVALUABLE to have the RIMS tube incorporate a 1.5" or 2" Triclamp sight glass so you can see if it has flow and is full to avoid dry-firing. I like to put in the element from the bottom and allow the natural heat to be able to convection out any bubbles or air pockets. This uses a nice 5500W straight fold back 240v element with 1.5" triclamp and 3 prong L6-30P plug to allow quick/easy cord connection from typical RV cord (I only plug this into a 30A GFCI protected outlet via an L14-30P/R cord with neutral and ground).
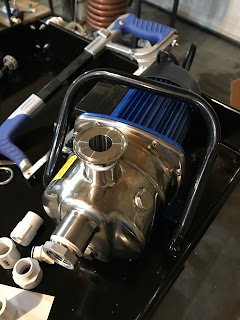
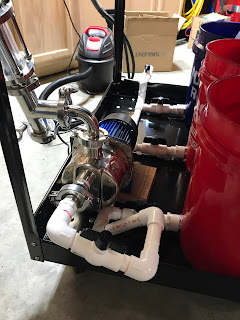
Once the pump arrived, I was able to begin test fitting placement and how to mount the RIMS on the outlet as well as finish plumbing and gluing in the inlet. I ended up being very tight for space and had to do some meandering 90' fittings to get it to be able to double back into the pump inlet. I made sure to use all 1.5" TC fittings so I can completely pull the pump out and the buckets as a single piece inlet and the return are separate.
Next was to salvage my old manual 240v knife switch panel I originally used for my brew frame briefly before getting the full Brew Buddy II automated panel. I thought I could make use of one of the spare lighted 1/2" toggle switches for the 120V pump control mounted in the door of the knife switch and fuse box for the 5500W 220v heater. It wasn't hard to rework the wiring and fit it in and get wired up to the full setup. This uses an L14-30P and 30R cord that I spliced in and then use a converter plug to move to the L6-30P heater.
The last thing was to put on the 1/2" NPT temp probe with 4" shaft and the 1/2" SS tee connecting the one way check valve and a shut off valve from an air chuck input to the 1.5" TC fitting on the top of the RIMS tube tee. I plan to use the air, at 10lbs psi, to be able to help push liquid out of the keg when I shut off the pump (it should help purge the residual PBW, starsan, and water from the inverted keg. I may also work up an adapter to connect to the air inlet with my CO2 to purge kegs.
Got some test runs of the flows (lots of leaks as I hadn't put Teflon on some of the fittings or even tightened some down as I fit everything up). I have lots of drips coming from the bulkheads and need to seal inside with silicon. I also have lots of turbulance being created by the return it is so strong. I'm really happy/impressed with the flow on this pump. Dumps 3.5 gallons in under 20 seconds. Pressure is really good and strong. This will really make a CIP stand up and pulse!







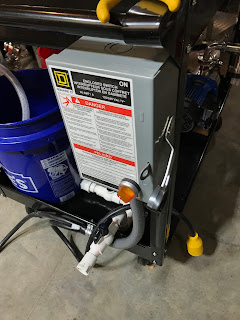

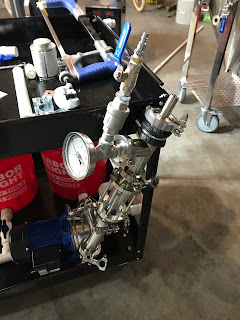


Update: this works great and the pump is EXTREMELY powerful and can fill a Fermenter WAY faster than it will drain (even under some pressure). Also, kegs tend to fill fast and then slow as pressure builds, but it will REALLY push a lot of flow through (a 5 gallon reservoir is not quite enough, really...
ReplyDelete